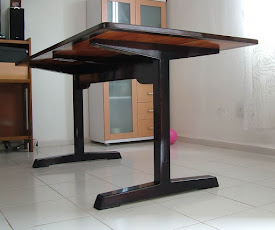
Sometimes a single theme seems to be everywhere, you'll see...
1. Yesterday I read this post about wagon vise design.
2. Today I got an e-mail with a comment from somebody else about my own wagon vise.
3. Today I found this post about living without any vise on the workbench.
4. Today I noticed several visits to this post, here in my blog, where I partialy show my wagon vise
.
And then it occurred to me to write a quick post with some details about my wagon vise.
And yes... this is another english exercise for me, remember I'm a spanish speaker, my english have a lot of mistakes and may be you can't understand me, so I try to compensate with a lot of pictures.
.
WAGON VISE
I live in a region where buying a nice wagon vise is not possible. Hardware stores in my town are far far away from selling specialized woodworking hardware. Buying in internet was a choice, but international shipping charges are to high. And there is no fun on clicking a mouse to get a tool, I prefer to click on my power tool's trigger to build my own stuff.
.
.
.
When I glued the strips for my table top, I considered 5 strips shorter to get a proper space for the wagon vise. Once the glue was set, and after flattening the table top I cut an edge rabbet on the bottom of the table top. I used a straight bit mounted on my router and then used a chisel to square the ends. Note the groove on the end grain of my table top, I'm going to install a tongued end trim there, but not yet... more on that latter.
(Here you are looking the bottom of my table top)
.
.
I needed the help of a blacksmith to weld this sort of guide. It's a standard nut welded to a flat steel bar. There is a hole in the flat steel bar so the threaded rod will engage the nut and pass through that hole without binding. I painted the guide black (against rust) and drill countersunk holes for mounting screws. I don't how to call this piece, so let's call it as guide nut... :$
.
.
The bench dog runs mounted between two steel runners. The two runners are flat steel bar with countersunk holes for mounting screws, that way I'm going to be able to disassemble the wagon vise if any bad thing happens in the future. I cut the grooves in the bench dog on the table saw, I used an external blade from a dado set. I was afraid about binding but the bench dog ended running very well and no lubricant was needed, just a loose fit.
.
.
Do you remember the tongued end trim? I need to do some work on it before installing it.
I drilled a hole with a forstner bit at the drill press because I wanted to be sure it was perpendicular. The hole is the same diameter as the hole in the flat steel bar, -behind the welded nut. That hole size should allow the threaded rod to pass through freely.
.
.
After installing the end trim I used the previously drilled hole as a guide to complete the hole through the rest of the wood. In this case I had to use a spade bit because the forstner bit was to short
.
.
The threaded rod will pass through the previously descripted hole, it will be fix in place with the "guide nut" and then will met the bench dog.
How does the threaded rod met the bench dog? I believe this picture will explain much better than me.
.
.
I used a standard threaded rod, so I will need a lot of turns to move the bench dog from one position to another. So I drill two dog holes in the bench dog because it is faster to move the bench dog than to wind the screw. I'm glad I did that.
.
.
Another great feature on my wagon vise is the big wooden
wheel.
The nut in the next picture is locked in place with a
removable pin. The pin is the shank of a longer drywall screw
(I cut off the threaded section). The pin sits
flush in a countersink hole. I chiseled the shape of the nut in the center of the wheel just half of the width of the wheel. The wheel is locked in place with a washer and a nut -from the other side.
I love this wooden wheel. I only need to give it a hard push/pull and it will remain
spinning a while -doing
the most of the winding job thanks to the
inertia.
.
.
I positioned the dog holes in my table top with not so much space between them. Do you remember the two holes in the bench dog? I have plenty of dog holes so I don't need to move the bench dog a lot. And that's the best part!!!

.
.
I'd like to hear what you think...
Nos vemos luego!!!!


Great job!!
And it look very nice.
I make my own!!!!!