


[227] SPICE BOX (Part III) OGEE BRACKET FEET
Posted: martes, 16 de agosto de 2011 by Superhero!! in
I have already finished the Pennsylvania Spice Box project. But before showing the pictures on the finished box, I'll write one last post about another new technique that I had to learn. This time is the case for Ogee Bracket Feet.
.
OGEE BRACKET FEET
.
I started the ogee bracket feet construction by drawing a template. I drew it in AutoCAD program and printed in autoadhesive paper. Then I stick it to a scrap piece of plywood and trim it at the scroll saw. The idea is to get a template that I can use more than once. I also milled four blanks, each one will yield two feet halves.

.
.
I worked the joinery in pairs because working with longer pieces is easier than working with short pieces. I tilted my saw at 45° and cut a miter on each end. With the saw still at 45° is a good idea to cut a groove for a spline, just adjust the saw blade's heigth and make some test in scrap wood.

.
.
Use the template to transfer the shape on the workpieces, be sure to keep the template tight to the edges. I had to do some eyeballing to find the center of the semi-circle that forms the spur and draw a dot in place.

.
.
Next step is to cut the feet halves. First use a forstner bit to drill a hole in order to get a sharp spur (using the eyeballed dot), then finish the cutting job at the scroll saw.

.
.
Note the grain direction on the spline. The spline is a great help to keep the pieces aligned but I didn't find an eficiently way to apply clamps... The ogee shape is very odd for clamps... Dang, that's a huge and embarrasing gap, fortunately is not a show area so nobody will see it.

.
The outside face of the feet has a particular profile, one part is concave and the other part is convex. With a band saw this should be straightforward, my problem is that I don't have a bandsaw. So I scratch my head and then it ocurred to me to cut the concave part of the profile using the cove cutting technique. This worked very fine so I was very proud of my discovery, unfortunately after a couple of days I found this article in the web, so my discovery wasn't new. dang!!

.
.
But still had to solve another problem. There's a convex part to be done to complete the profile. What to do? I scratched my head again but nothing happens. So I got a beer, then another, and another and... vualá!! Inspiration arrives. Lay out some lines and then used my block plane to cut a "big chamfer". Check this out:
But still had to solve another problem. There's a convex part to be done to complete the profile. What to do? I scratched my head again but nothing happens. So I got a beer, then another, and another and... vualá!! Inspiration arrives. Lay out some lines and then used my block plane to cut a "big chamfer". Check this out:

.
.
With the "big chamfer" finished the next step was to "soften" the profile. A few additional passes with the block plane, a little sanding work and I was done.

.
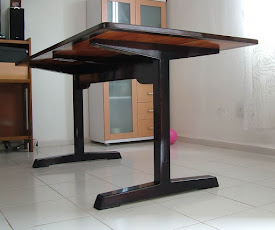
Once installed, the ogee feet should be reinforced. I glue up a vertical wood block to carry the load and two horizontal ones to reinforce the grip of the feet to the box. It looks odd to me, but I found similar approaches like this on the web so I believe it's right.

.
I know my ogee feet are not perfect. But I enjoyed exploring and learning this techinque,-this is something I had never done before-. My ogee bracket feet are good enough for me and that's all I need. :)

.
.
.
You can also read:
Part I: Resaw wide boards
Part II: Hand cut through dovetails
Part III: Ogee bracet feet
Part IV: Finished project
Gracias por la información. Sumamente didáctico.